Sunday, October 24, 2010

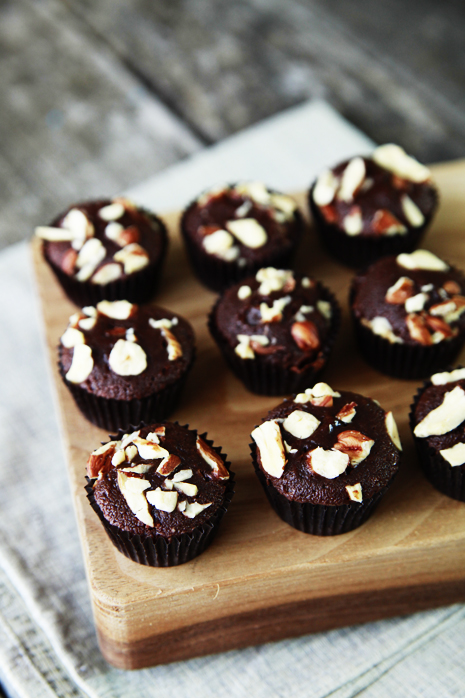
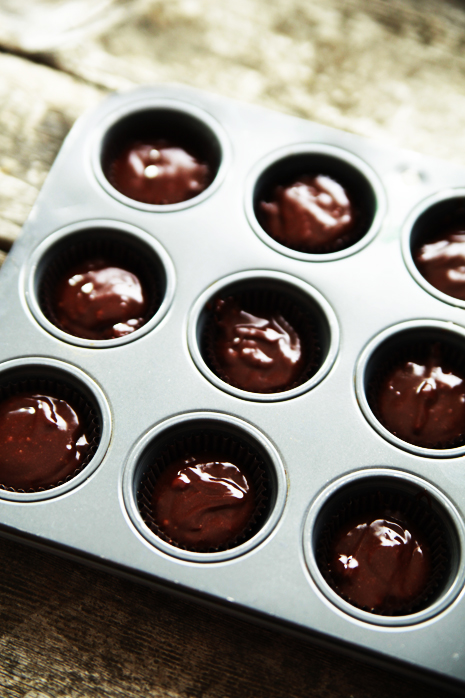
Nutella Fudge Brownies


This recipe comes from pasty chef, cookbook author, and Fine Cooking Magazine’s contributing editor, Abby Dodge. Photos and layout by Savory Sweet Life Blog. Feel wanna share with you all who bumped into my blog as this recipe is so good and easy.

Nutella Fudge Brownies

Makes 12 Brownies

Ingredients:

1/2 cup Nutella spread

1 large egg

5 tablespoons all=purpose flour

1/2 cup chopped hazelnuts

Directions:

1. Heat the oven to 350 degrees. Line a 12-cup mini muffin pan with paper or foil liners.

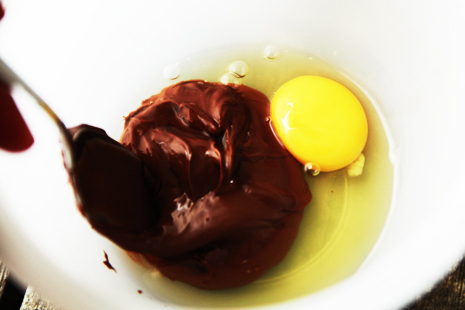
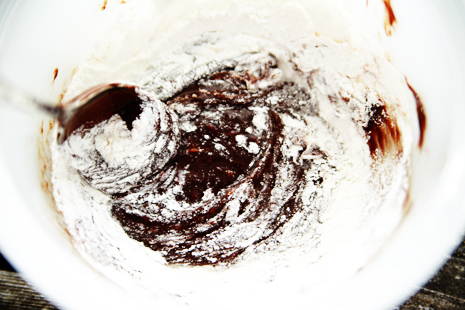
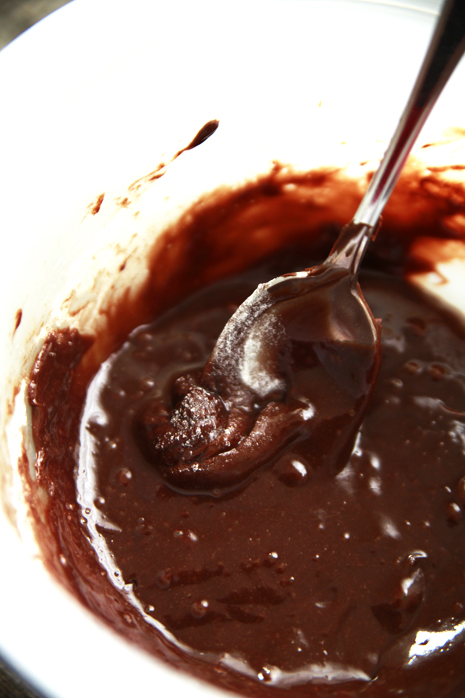
2. Put the Nutella and egg in a medium bowl and whisk until smooth and well blended. Add the flour and whisk until blended.

3. Spoon the batter into the prepared muffin tins (about 3/4 full) and sprinkle with the chopped hazelnuts.

4. Bake until a pick comes out with wet, gooey crumbs, 11 to 12 minutes. Set on a rack to cool completely. Serve immediately or cover and store at room temperature for up to 3 days.

Switch-Ins: In place of the hazelnuts, switch in one of the following:

  • ground cinnamon, 1/4 teaspoon (add with the flour)
  • peanuts, chopped, 1/4 cup

Some Tips in Melting Chocolate For Decorating a Cake


Melting and Piping Chocolate

Here's the equipment you will need to melt and then pipe chocolate:

  • cutting board
  • paring knife
  • glass measuring cup
  • small saucepan
  • rubber spatula
  • small zipper-style plastic food
  • storage bag
  • kitchen scissors
  • Unsweetened, semisweet or milk chocolate (squares or bars)
  1. Place chocolate on cutting board; shave it into small pieces with paring knife.

     Be sure to use a sharp knife that won't catch or slip.
    Be sure to use a sharp knife
    that won't catch or slip.

  2. Place shavings in measuring cup. Fill a saucepan one-quarter full (about 1 inch deep) with warm (not hot) water. Place measuring cup in water to melt chocolate, stirring frequently with rubber spatula until smooth. (Be careful not to get any water into chocolate.) Remove measuring cup from saucepan. Let chocolate cool slightly.

  3. Fill plastic bag about half full with melted chocolate. Seal bag securely.

    Use care when pouring melted chocolate into plastic bag.
    Use care when pouring melted
    chocolate into plastic bag.

  4. Cut off very tiny corner of bag with scissors.

    Start with the tiniest cut off the corner. You can always enlarge the hole if it isn't big enough.
    Start with the tiniest cut off the corner.
    You can always enlarge the
    hole if it isn't big enough.

  5. Gently squeeze bag, piping chocolate onto cake using an even, steady flow.

Chocolate Shapes

  1. Complete steps 1-4 above.

  2. Gently squeeze bag and pipe chocolate in a steady flow onto sheet of waxed paper, making a variety of small shapes. Stop squeezing and then lift bag at end of each shape. Create flowers, hearts, Christmas trees, lattice shapes, or any lacy pattern.

    Make chocolate shapes as fanciful as you want.
    Make chocolate shapes as
    fanciful as you want.
  3. Let stand in cool, dry place until chocolate is firm. (Do not chill in refrigerator.) When chocolate is firm, gently peel shapes off waxed paper. Store shapes in cool, dry place until ready to use.

    It might be helpful to use a small knife to peel the shapes off the waxed paper.
    It might be helpful to use a small knife to
    peel the shapes off the waxed paper.

Melting and Piping White Chocolate

Here's what you will need to melt and pipe white chocolate:

  • small resealable plastic freezer bag
  • microwave oven
  • kitchen scissors
  • white chocolate baking bars
  1. Place white chocolate baking bar in small resealable plastic freezer bag.

  2. Microwave at MEDIUM (50% power) 2 minutes. Turn bag over; microwave at MEDIUM 2 to 3 minutes or until white chocolate is melted.

  3. Knead bag until white chocolate is smooth.

    Kneading the melted white chocolate helps smooth out any lumps.
    Kneading the melted white chocolate
    helps smooth out any lumps.

  4. Cut off very tiny corner of bag with scissors.

  5. Gently squeeze bag, piping white chocolate onto cake, using an even, steady flow.

    Use a zigzag motion to get a pretty drizzle effect.
    Use a zigzag motion to get a
    pretty drizzle effect.

Adding Nuts or Crumbs to the Side of the Cake

  1. Tuck small strips of waxed paper under a two- or three-layer cake to keep plate clean. Completely frost the cake with frosting of your choice.

  2. Place cookie crumbs, chopped nuts, chopped candy bits, or coconut in small bowl.

  3. Using palm of hand, pat crumbs onto side of cake. Work on one small area at a time and rotate cake plate as you go.

  4. When finished, remove waxed paper strips.

     An edge of crumbs or chopped nuts makes a cake look elegant.
    An edge of crumbs or chopped nuts
    makes a cake look elegant.

Sifted Cocoa and Sugar Patterns

Here's what you will need to form sifted cocoa and sugar patterns:

  • waxed paper
  • doily with large pattern
  • large spoon
  • fine-mesh sieve
  • skewer or toothpick
  • unsweetened cocoa powder or powdered sugar
  1. Cut waxed paper into strips, each 2 to 3 inches wide. Tuck strips under cake to keep plate clean.

  2. Position doily on top of cake.

    # Carefully position the doily in the center of the cake.
    Carefully position the doily in
    the center of the cake.

  3. Spoon cocoa powder or powdered sugar into sieve.

    #  Hold the sieve over a sheet of waxed paper for easier clean up.
    Hold the sieve over a sheet of
    waxed paper for easier cleanup.

  4. Holding sieve over cake, gently tap sieve with hand to sift cocoa powder or sugar in an even layer over entire surface.

    #  Move sieve over cake slowly and smoothly for an even effect.
    Move sieve over cake slowly and
    smoothly for an even effect.
  5. Carefully remove waxed paper strips. Remove doily with skewer or toothpick.

    Work carefully so you don't disturb the pattern.
    Work carefully so you
    don't disturb the pattern.

TIP: Cocoa powder works well for light-colored desserts; powdered sugar is best for dark-colored desserts.

Gingham Variation

Omit doily. Cut clean sheets of paper into 8 to 10 strips, each strip 1/2
- to 3/4-inch wide and long enough to fit across top of cake you wish to cover. Arrange paper strips in crisscross pattern on top of cake. Continue as directed in steps 3-5 above.

This simple paper strip technique produces a very impressive look.
This simple paper strip technique
produces a very impressive look.

Tinting and Toasting Coconut

  1. To tint coconut, place coconut in resealable plastic food storage bag.

  2. Combine small amount of food coloring with water in small bowl; add to bag. Seal bag; shake until evenly coated.

  3. To toast coconut, spread coconut evenly on baking sheet. Preheat oven to 350 degrees Fahrenheit. Toast about 5 minutes or until lightly browned, stirring coconut occasionally to ensure even browning.

Chocolate Curls

Here's the equipment you will need to make chocolate curls:

  • cutting board
  • paring knife
  • glass measuring cup
  • small saucepan
  • rubber spatula
  • baking pan
  • metal spatula
  • small skewer or toothpick
  • waxed paper
  • semisweet chocolate (squares or bars)
  • shortening
  1. Place chocolate on cutting board; shave it into small pieces with paring knife.

    #  The finer the shavings, the faster the chocolate will melt.
    The finer the shavings, the faster
    the chocolate will melt.

  2. Place shavings in measuring cup. Add shortening. (Use 1 teaspoon of shortening for every 2 ounces of chocolate.) Fill a saucepan one-quarter full (about 1 inch deep) with warm (not hot) water.

  3. Place measuring cup in water to melt chocolate, stirring frequently with rubber spatula until smooth. (Be careful not to get any water into chocolate.)

     Be careful not to get even a drop of water into the chocolate. It will seize up.
    Be careful not to get even a drop of water
    into the chocolate. It will seize up.

  4. Remove measuring from saucepan. Let chocolate cool slightly.

  5. Pour melted chocolate onto back of baking pan. Quickly spread chocolate into a thin layer (about 1/4 inch thick) with metal spatula.

     A long, flat metal spatula makes it easier to spread the chocolate in an even layer.
    A long, flat metal spatula makes it easier
    to spread the chocolate in an even layer.

  6. Let stand in cool, dry place until chocolate is firm. (Do not chill in refrigerator.) When chocolate is just firm, use small straight-edge metal spatula to form curls. Holding spatula at a 45-degree angle, push spatula firmly along baking pan, under chocolate, so chocolate curls as it is pushed. (If chocolate is too firm to curl, let stand a few minutes at room temperature. Refrigerate again if it becomes too soft.)

    #  Scrape slowly and deliberately so curls don't break.
    Scrape slowly and deliberately
    so curls don't break
  7. Using small skewer or toothpick, transfer curls to waxed paper. Store curls in a cool, dry place until ready to use.

     Just slip the curl onto a skewer and lift it off the baking pan.
    Just slip the curl onto a skewer
    and lift it off the baking pan.

Chocolate Cutouts

  1. Complete steps 1-3 above.

  2. Line inside of baking sheet with waxed paper. Pour melted chocolate into prepared baking sheet; quickly spread chocolate into a thin layer (1/8- to 1/4-inch thick) with metal spatula.

    Work quickly when spreading the melted chocolate, but try to keep an even stroke with the spatula.
    Work quickly when spreading the melted
    chocolate, but try to keep an even stroke
    with the spatula.

  3. Let stand in cool, dry place until chocolate is just firm. (Do not chill in refrigerator.)

  4. Cut chocolate into shapes with hors d'oeuvre or cookie cutters, placing cutters as close together as possible.

    Use cutters in simple shapes for best results.
    Use cutters in simple shapes
    for best results.

  5. Carefully remove cutouts with metal spatula. Store the cutouts in a cool, dry place until ready to use.

     You might need to use the tip of a small paring knife to start lifting the cut-outs.
    You might need to use the tip of a
    small paring knife to start lifting the
    cutouts. Finish with the metal spatula.

TIP: For ease in cutting chocolate, slightly warm cutters with hands before cutting out shapes.

White Chocolate Curls

Here's what you will need to make white chocolate curls:

  • cutting board
  • paring knife
  • 2-cup glass measuring cup
  • waxed paper
  • cookie sheet or baking pan
  • sharp knife
  • metal spatula
  • white chocolate baking bars
  • shortening
  1. Place white chocolate on cutting board; shave it into small pieces with paring knife.

  2. Place white chocolate shavings and shortening in measuring cup. (Use 1 teaspoon of shortening for every 2 ounces of chocolate.)

  3. Microwave on HIGH (100% power) for about 11/2 minutes or until melted, stirring after every 30 seconds of cooking

  4. Pour melted white chocolate onto back of baking pan. Quickly spread chocolate into a very thin layer (about 1/8- to 1/4-inch thick) with metal spatula. Refrigerate white chocolate about 10 minutes or until firm, but still pliable.

    # Spread the melted chocolate quickly and evenly.
    Spread the melted chocolate
    quickly and evenly.

  5. Use small straight-edge metal spatula to form curls. Holding spatula at a 45-degree angle, push spatula firmly along baking pan, under chocolate, so chocolate curls as it is pushed. (If chocolate is too firm to curl. Let stand a few minutes at room temperature. Refrigerate again if it becomes too soft.

    # Try to maintain a 45-degree angle for the best curls.
    Try to maintain a 45-degree
    angle for the best curls.
  6. Using small skewer or toothpick, transfer curl to waxed paper. Store curls in a cool, dry place until ready to use.
White Chocolate Cutouts
  1. Melt white chocolate baking bars (do not add shortening) in small bowl set inside larger bowl half filled with very hot water, stirring occasionally.

    Melting the white chocolate will take about 10 minutes.
    Melting the white chocolate
    will take about 10 minutes.

  2. Line cookie sheet or baking pan with waxed paper. Pour melted white chocolate onto waxed paper; quickly spread chocolate into a thin layer (1/8- to 1/4-inch thick) with rubber spatula.

    #  If you use a cookie sheet, keep melted white chocolate a couple of inches from the edge.
    If you use a cookie sheet, keep melted
    white chocolate a couple of inches
    from the edge.

  3. Refrigerate until white chocolate is just firm, about 15 minutes.

  4. Cut chocolate into shapes with sharp knife (or use hors d'oeuvre or cookie cutters).

    Large geometric shapes can make dramatic decorations.
    Large geometric shapes can
    make dramatic decorations.

  5. Immediately lift cutouts carefully from waxed paper with metal spatula or knife. Refrigerate until ready to use.
Chocolate-dipped Fruits and Nuts

Here's what you will need to make chocolate-dipped fruits and nuts:

  • cutting board
  • paring knife
  • glass measuring cup
  • small saucepan
  • rubber spatula
  • waxed paper
  • semisweet or unsweetened chocolate (squares or bars)
  • fresh or dried fruits
  • whole or halved nuts
  1. Place chocolate on cutting board; shave it into small pieces with paring knife.

    Be sure to use a sharp knife that won't catch or slip.
    Be sure to use a sharp knife
    that won't catch or slip.

  2. Place shavings in measuring cup. Fill a saucepan one-quarter full (about 1 inch deep) with warm (not hot) water. Place measuring cup in water to melt chocolate, stirring frequently with rubber spatula until smooth. (Be careful not to get any water into chocolate.) Remove measuring cup from saucepan.

  3. If using fresh fruit, wash and dry well. Dip fruits and nuts, one at a time, into melted chocolate, until chocolate coating comes about two-thirds of the way up the side. Allow excess chocolate to drip off.

    Aim for a light coating of chocolate.
    Aim for a light coating of chocolate.

  4. Transfer dipped fruits and nuts to waxed paper. Let stand in a cool, dry place until chocolate is firm. (Do not chill in refrigerator.)

Indonesian Chicken Rice Porridge served with cakwe*

For many families in Asia including in Indonesia, a typical day begins with a bowl of rice porridge. Although rice porridge comes from humble beginnings, today it is served with a variety of exotic toppings. Here in Indonesia, we call this as Bubur Ayam (bubur=porridge; Ayam= chicken).


*cakwe = Chinese long donut, available in Asian/ Chinese Store or you may make your own cakwe. :-)

A Slice of Cheese Cake

Bagels

Home Made Donut


Bahan:
Terigu high protein 500grams
Ragi instant 11grams(1sachets)
baking powder 2,5 grams (tapi gw biasanya pake 1sdm)
gula pasir 75grams
garam secukupnya
mentega/margarine 50grams
telur 1 butir
Air +/- 250grams (BUKAN liter yah!)
CARA BUAT:
1).Campurkan tepung terigu, gula, ragi instant dan baking powder aduk hingga rata, lalu masukan telur dan air seikit demi sedikit kemudia aduk kembali hingga tercampur rata.
2).Masukkan mentega/margarine, aduk hingga kalis/halus. (tips: setelah membentuk adonan, bisa pake mikser roti utk membuatnya kalis)
3).Istrirahatkan selama 30 menits.
4).potong dan bentuk bulat2, istirahatkan kembali selama 10 menits.
5).Lubangkan adonan dan diamkan kembali hingga mengembang cukup besar.
6).Goreng dgn minyak panas.
7).Donut siap di beri topping sesuai selera.

Wholemeal Bread


Ingredients:
(makes a 20cm round bread)


150g bread flour
150g wholemeal flour
1 teaspoon instant yeast
2 tablespoon sugar
1 teaspoon salt
10g butter
170ml water

Method:

  1. Place bread flour and wholemeal flour in a mixing bowl and stir with a whisk to combine. I did this by measuring both types of flour in a plastic bag and then give a few shakes to mix the flours.
  2. Place all ingredients (according to the sequence as stated in your bread machine manual) in the bread pan and set the machine to the Dough setting. You can either leave the dough to proof in the machine, or let it proof in room temperature. If you are proofing the dough in room temperature, place it in a big mixing bowl, and cover it with cling wrap. Let is rise till double in bulk, takes about 1 hour.
  3. Remove dough from bread machine/mixing bowl. Knock out the dough and give a few light kneading. Gently flatten the dough and shape into a smooth ball. Place dough on a baking sheet lined with parchment paper. Cover with a damp towel or plastic bag and let it proof for another 30mins. Note that this time round, instead of cling wrap, you should cover the dough with plastic bag, as the cling wrap may stick onto the dough and prevent it from rising properly.
  4. Preheat oven to 180 degC. Dust with some wholemeal flour and make 2 long slits on the dough with a sharp knife. Bake for 30mins until the crust turns golden brown. Remove from oven and let cool on a rack.
recipe source: happy home baking
photo by : VeganMoFo26